Showing posts with label craft. Show all posts

Wednesday, April 1, 2015

Frog it or Forget it?


We're asking the tough questions today.

A recent adventure in "Failure to Read the Pattern Closely" resulted in me being fifteen rows into Briquette by Two Little Plums and finding myself with a bunch more stitches than required. Not like, "Oh, I did one extra row of increases, oops!" No. This was more, "Oh. I increased eight more stitches than required each row for the last seven right-side rows." A major boo boo. One that there was no doubt that I had to frog and restart.
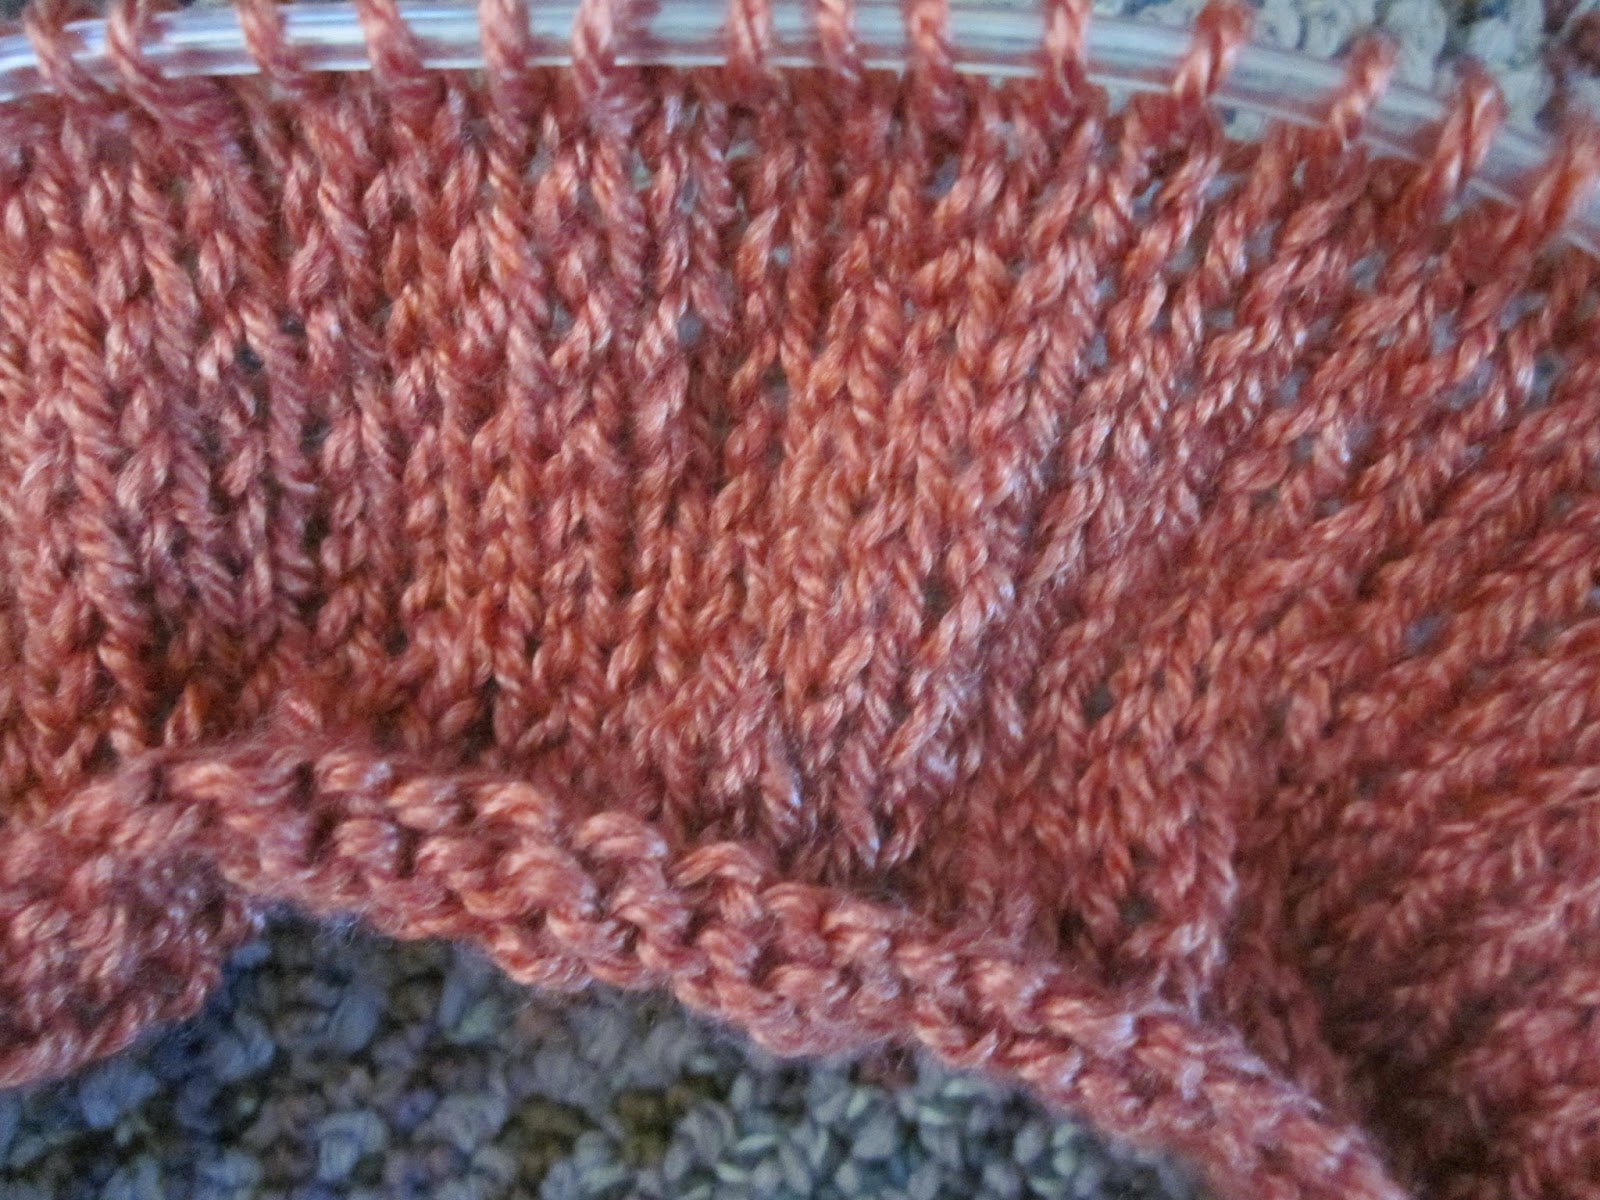

As I was pulling the work off my needles, I got to thinking about where I draw the line between frogging a mistake and just forgetting about it. (For those who don't know, frogging means ripping your work out. Because frogs go, "rip-it, rip-it." Yes I know. Puns. But still. That's what people call it.) For me, a project has to be pretty much nonredeemable to inspire me to frog. If I have up to four stitches too many/too few, I just adjust my work in the next round. Sometimes I can put up with a larger margin for error, depending on the project. I am not a Frogger, for the most part. I am a Forgetter.


I have two very crafty and meticulous Grandmothers who don't do things half way, an aunt whose sewing skills are magazine worthy, a sister who enjoys making photo-realistic paintings and doilies with sewing thread, and a mom whose recent major crafting achievement was making an evening gown out of 1" strips of silk from ties. Let's not even talk about my friends who craft. Suffice it to say, precision is all around me.

But for some reason, I ended up in the Forgetter camp. I ended up feeling alright with myself for pushing past imperfections in my work and just loving the finished object. I'm not saying it's wrong to want to "have it right." I'm just saying there are primarily two camps in the crafting world: People who Frog, and People who Forget.


When I look back at early work I've done, be it sewing, crocheting, painting, or knitting, the mistakes stare back at me blatantly. Sometimes, I see the mistakes nobody else sees. We are always our own worse critics. But, I kind of like the little errors.

Maybe it makes me weird, but I like to be reminded that I'm constantly learning. When I see the gap in the first lace I knit I think, "There's a mistake I now know how to avoid!" When I see the missed stitches on the first scarf I crochet I think, "Now I know how to make sure I'm at the end of the row!" Sometimes the mistakes irk me, but for the most part I like them.

I always think back to one statement someone made to me about twelve years ago. I took a beading class with my Girl Scout Troop and had messed up in the color pattern on my necklace. It was just a little goof up, and I was ready to rip the whole thing out. The instructor said, "I always leave my mistakes in. Nobody is perfect. If we were perfect, we'd be God."

Maybe I'm using it as an excuse to be a lazy crafter, but I think of that line every time my bias tape bundles up or I miss a ribbed stitch.

Unless of course, I have fifty six extra stitches. In that case, SO LONG YA NASTY MESSED UP SWEATER YOKE!!!


-----

Where do you draw the line between frogging and forgetting?

Tuesday, November 18, 2014

Give Yarn


 If you read my blog, I think it is a pretty safe bet that you or someone you know is into fiber. And I don't mean the dietary stuff. You like yarn. You like it a lot! You like to use it, you like to buy it. But even better: you like to get it as a gift. Or maybe you don't! Maybe you stumbled upon this post in search of tips on how to give yarn to a crafty friend. Regardless of the details, if you are looking to do some yarn-gifting/receiving this year, you are in the right place.

For all of you lovelies looking to give nice gifts of yarn this year (and we crafty folk thank you in advance for trying to do something better than stop at Walmart for some Red Heart), read on for some fun tips. For all you sneaky-snakes who want to receive some nice yarn this year, just leave this post opened on your browser until your significant other/mom/cousin/dog/whoever sees it and takes the hint. Or, the less passive aggressive route, just straight up tell your friends and family you want some yarn and send them here for a few tips.

Let's get rolling! Feel free to add your yarn-gifting tips in the comments section! I love hearing creative ideas. Gifting is my love-language, so I am all about gifting tips.

First up: Jimmy Beans
Jimmy Beans is the self-proclaimed "local yarn store online" for all yarn folks. I am personally a HUGE fan of their amazing gifting options. They have all sorts of gift sets at all sorts of different price ranges. A lot of their sets come with patterns or correspond to very popular free patterns. Check out their gift ideas page to see all the options. Here are two of my favorites:

I am kind of an alpaca junkie, so this is naturally something that would attract me. With these gift boxes, you get to choose from a variety of color themes and prices. Most of them are $110, which would certainly make the casual buyer (aka me) balk. There are some (like the one pictured above) that are $75. Keep in mind, you are purchasing a luxury yarn. There is enough yarn in each box to complete a lovely shawl that is available on the website as a free download.


These are MUCH more affordably priced and still oh-so-cute. The yarn bouquets on Jimmy Beans' site come in a wide range of colors. Most of them come with a pattern as well. They range from $40-225 (Yikes! I know). In all honesty, this is a yarn-gifting idea that you could take into your own hands if you are slightly intrepid and have a working knowledge of what the recipient would like in terms of fiber content. These yarn bouquets would be easy enough to make up yourself for that special someone. I won't tell if you get the yarn on sale and make your own arrangement!! Plus, I think they'd be kind of fun to make.


Next: Knit Picks
 Another big-name in the online yarn world, Knit Picks has quite a few giving options that just might suit the lucky yarner in your life. They have tons of patterns on their site, and always offer yarn suggestions to help you pick out the perfect amount for the project at hand. Plus, they have tons of great tools. Here are my top pick from KP:


This pattern is actually six patterns in one. You can use their on-site kit builder to customize the type and colors of yarn that come in the kit. How cool?? A lot of their patterns have the option to build your own kit. If you can't find a kit building option for the pattern you want to buy, they have great customer support to help you choose a suitable yarn. Aren't these mitts too cute??


This set is actually going bye bye from Knit Pick soon, which makes me really sad. Whether you knit or crochet, you have to admit these rainbow-wood hooks are stunning. They also sell knitting needles of the same wood. A luxurious set is a wonderful gift. You can never have too many hooks or needles! Right? Right. That's what I keep telling myself.


And Finally: DIY ideas
I can't stand just posting pricey options for gifts. The Do-it-yourself spirit in me will not allow it!! So I've come up with some fun ideas on how to give yarn that are a little more DIY friendly.

1. Yarn Bouquet
You saw the picture above of how Jimmy Beans does it, so why not adapt it to be your own? All you need are some nice skeins of yarn, some skewers or knitting needles, a vase, and pretty ribbons. You could even scour Ravelry for some nice free patterns to go with the yarn you chose and print them out on pretty cardstock. Fancy!

2. Gift Card Snowglobe
Some people think gift cards are a cop-out. I disagree! If buying nice yarn for a friend makes you nervous (Will they like it? Will it be the right color?), go for a gift card and make it cute by presenting it in a snowglobe. There's a great tutorial here by The Creative Mama on how to make one.

Photo (c) thecreativemama.com

Where to get a gift card from besides Michael's and Hob-Lob? How about:
-Ravelry (for patterns!)
-Etsy (for hand-dyed options!)
-A Local Yarn Store (for supporting your local economy!)
-KnitPicks (for stuff and things!)
-Their Fave Yarn Company (for yarn!)
-Amazon (for books!)
(Some of these retailers might not have the "card" gift cards required to make the snowglobe)

3. Soap Gift
I know I'm on a soap kick, but why not give your fave yarn-lover a nice, handmade soap like the ones from Besem Natural Scents on Etsy along with a luscious cotton yarn and a cute washcloth pattern? A small, fun, clean gift.
Photo (c) Besem Natural Scents
Some free washcloth patterns from Ravelry (don't forget to print it on colorful cardstock to make it supah fahahahancy):
Washcloth Quartet (knitting)
Washcloth that Holds Soap (knitting)
Shell Stitch Washcloth (crochet)

4. Mug of Yarn
Got a coffee or tea lover? How about scoring a cute mug from the thrift store and popping a ball of wool in it along with some instant coffee/hot cocoa/tea bags? For mega cute points, include a decorative spoon and a pattern for a mug-cozy from Ravelry.

Mug Cozy by Bubble Girl Knit & Crochet (crochet)
Mug Cosy by threebeansinapod (crochet)
Fancy Mug Cozy by Kristen Hipsky (knitting)

5. Baby Yarn
I have a lot of friends who are expecting in the spring. If you know a crafty lady who has a bun in the oven, why not give her something crafty and practical? Pick out some nice baby cotton (or anything soft and washable!) and put it in a sweet little basket. Include Babies R Us giftcards, some little baby toys, and a pattern for an easy baby blanket. Maybe whip up some washcloths from the patterns above and tuck them in there too. I go through washcloths like crazy here.

These patterns are easy, but cute. Great for whiling away the last trimester. Or even working on during early labor! I totally knitted in the delivery room when we first got there.

Rainbow Ripple Baby Blanket (crochet)
Chevron Baby Blanket (knitting)


Monday, October 27, 2014

Felting an Angora Sweater


My mom has a way of gifting me the most challenging things. I mean that in a good way. She finds things that she knows can be re-purposed, and hands them over to me to get my gears turning. A few weeks ago, while we were chatting on the phone, she mentioned she was "done" with a sweater she'd had for years.


"I took the buttons off already. Do you want it to felt?"

"What is it made of?"

"Angora, I think."

"Ohhhhh yes please."

"Okay, I'll mail it to you."


I actually forgot that she was going to mail it here, so when it arrived in the mail, I was super excited and surprised. As I mentioned before, she's had this sweater for years. It's one that I have lots of memories of her wearing. And all those snuggly/scratchy/fluffy angora hugs. The colors are so autumnal as well, which puts the sweater even higher on my "Yay" rankings. 


I popped the thing in the washer alone on the "ultra clean" hothothot setting. The first time through, it didn't felt much. So I put it back in, stuffed in a pillow case. I even put it in the dryer! Crazy. Though it did not felt down as much as I expected it would, I am very pleased with the result.


It has that beautiful halo of fiber so common of angora. I simply love it. I have a few ideas for what I'd like to do with it, but I'm just going to let my thoughts simmer for a little bit before I jump in to a project with it. I mean, it is full of sentimental value and lovely fiber. Don't want to rush in to something.

What have you felted?

Monday, March 3, 2014

Yarn to Dye For: How to KoolAid or Tea Dye Yarn

Last in Line: Dyeing Yarn with KoolAid or Tea For a long time, I have wanted to play with dyeing yarn. Remember when I saw that dye lab in Minneapolis a million years ago? Yeah, well, that's what I want in my life. But this weekend I was finally pushed over the edge to give in and try dyeing by my dear friend Lizzy, and I have no such amazing laboratory for color science. Luckily, there are a lot of techniques you can do right in your own kitchen! Or, in my case, someone else's kitchen!!

What is cooler than adding another handmade, one-of-a-kind, feature to craft projects? It's like taking handmade to the next level when you color your own materials!! I know you are already just as excited as I am about this, so let's get down to the steps!!!

You will need:
-100% wool (or other animal fiber) yarn
-A sink
-A microwave
-Some tea bags
-KoolAid Packets (there are lots of possible color combos, so do some research and choose what you like!)
-Some big ol' measuring cups that you can put into the microwave
-Water
-Vinegar (which I didn't have so my tea dyed yarn looks like poo)

Last in Line: Dyeing Yarn with KoolAid or Tea
Start by prepping your yarn. You have to decide how you want your yarn to come out in the end. I decided on looonnng repeats of two colors of tea, and a gradient-effect with KoolAid for my two balls o' yarn.

To achieve long repeats of two colors, you need to wrap your yarn into a big long loop and gently tie it so it won't come undone while dyeing. Then you plunk one end of the loop in one color and the other end in the other color. Tada! Long repeats!

For a gradient effect, wrap your yarn loosely in a ball. The wool at the middle will not absorb as much dye as the stuff on the outside, resulting in a light-to-dark gradient. Just make sure you make enough dye to cover the whole ball!

Before dyeing, fill your sink with warm wahtah and pop your yarn in to soak for about 20 minutes. This allows the yarn to dye faster and more vibrantly. You may need to use some plates to hold the yarn underwater if you are doing long repeats: the loop floats.
Last in Line: Dyeing Yarn with KoolAid or Tea
Now, prep your dye!! Since I knew my tea dyed yarn was going to take a lot of liquid and messing around, I did it first. As I said before, I made the big mistake of not using vinegar to make the dye acidic. So, my tea-dyed yarn didn't soak as much of the color up. But let that be a lesson, not a discouragement. I promise it works super well if you use vinegar.

Onto the dye-making. I did black tea for one color and green herbal tea for the other. For the black tea I boiled about a quart and a half of water in the microwave. I boiled a little less than a quart for the green tea. I used five teabags of black tea and six of green. I wanted the green to be more intense. When you measure out your liquid, make sure to do a 3 to 1 ratio for water to vinegar. It's gonna be smelly, but it'll look so niiiiceee.
Last in Line: Dyeing Yarn with KoolAid or Tea
 Let the tea steep for 5-10 minutes, depending on your desired darkness. Don't let it cool off all the way before you put your yarn in it. You want it to be warm still! Just be careful to avoid felting. Haha.
Last in Line: Dyeing Yarn with KoolAid or Tea
To make the KoolAid dye, I went waaayyyy dark. You don't need vinegar for KoolAid dyeing, because the powder is super acidic already. I boiled about a quart of water for two packets of strawberry KoolAid, half a packet of Crystal Light Strawberry Lemonade, and a packet of Raspberry Iced Tea. I was really messy, so I couldn't get pictures of the dye bath, but lemme tell you, it was blood red.

Now that you have your dye ready, pop your yarn in it and send it for a spin in the microwave. You need to cook it for two minutes, then let it rest for two minutes. Keep doing that until it has cooked for a total of 8ish minutes. Pull it out, and let that baby cool!

Once it is room temp, pull the yarn out and rinse it in cool/warm water. Not too cold or you will shock the fibers. Rinse the yarn until no more dye comes out and the water runs off clear. If you do the gradient effect, you will need to carefully unwind the ball of yarn and wrap it loosely into a loop when rinsing so it can dry better. Some people suggest rinsing with soap at this point, but I didn't. It's up to you.

All that's left is letting your yarn hang to dry overnight, and loving it to bits!!
Last in Line: Dyeing Yarn with KoolAid or Tea
 My tea dyed wool is going to get a redo once I get some vinegar. The black tea part dyed a little, but not as much as I want. Still, it was fun.
Last in Line: Dyeing Yarn with KoolAid or Tea
 My KoolAid dyed yarn is soooo pretty. I cannot get over the richness of the colors!!! It is going to be fun to pick a project to use it on.
Last in Line: Dyeing Yarn with KoolAid or Tea

Last in Line: Dyeing Yarn with KoolAid or Tea

Last in Line: Dyeing Yarn with KoolAid or Tea

Last in Line: Dyeing Yarn with KoolAid or Tea
Roxy (my parent's dog) was very interested

Last in Line: Dyeing Yarn with KoolAid or Tea

Last in Line: Dyeing Yarn with KoolAid or Tea

Last in Line: Dyeing Yarn with KoolAid or Tea
There you have it!! I cannot wait to dye all the things. I already have plans to try some of the techniques Lizzy has played with, as well as the ones Cyprienne at Big Knitting Trouble has been doing. She made a rainbow!! Come on guys. You know you want to tryyyyy.

Happy Monday!!!
Linkin' up at these fine sites!

Monday, February 24, 2014

An Update and a DIY: What's in the Cards for us?

Forever Last in Line: DIY Thank You Cards
As you may have noticed, I have been sort of missing in action the last few weeks. Things have been a touch crazy here since Phase #1 of our big move. In fact, they have been so crazy that our entire plan for moving and the whole reason we were going to move across the country fell apart.

Say whaattt?

Yeah, that's kind of how I felt when it all happened. The job Sailor got out West has been postponed until further notice. His employer gave him the choice to wait it out, or say "no thanks" and pursue other opportunities. After much talking and prayer, we went with the latter option. That meant that a) we were no longer moving, b) he didn't have a job anymore, and most importantly c) we would be staying in the area where both our families live. Pros and cons all over the place. And stress. Did I mention I was a bit stressed about all this? I was. Juussttt a bit.

This story has an amazingly happy ending though. Within four days of saying "no thanks" to several months of waiting to move and not having a pay check, Sailor got a job. What. A. Blessing. I cannot stop thanking God for providing for us. I mean, the job market is a bit slim where we will be living now, and he was able to find a job in four days. Four days people!! I've been doing my happy dance for a week now. Booyah!

How well this all worked out makes me feel super silly for stressing out so much. God finds a way to make schtuff happen no matter what. Gotta look through the clouds and rain and prepare for the sun.

Forever Last in Line: DIY Thank You Cards

Speaking of rain, it was super gross-nasty in the Midwest last week. Nasty rain-snow slush poo winter weather. I am so ready for spring. The last few days though, there's been hope. Sunshiney, slightly above freezing-y hope. But it's supposed to be below zero in a few days again. Gotta take what I can get, I suppose.

Forever Last in Line: DIY Thank You Cards
Bleck. Rainsnow.
 What better way to cheer the sloopy weather than by making pretty things?? And what better than making pretty things you can send to other people to spread the cheer?? I don't know! What could be better? Nothing, I think.

Forever Last in Line: DIY Thank You Cards
There is nothing more cheerful than a big stack of mail to send that isn't all bills.
 I've been taking any downtime I've had these last crazy weeks to distract myself with crafting. My sister is giddy with joy that Sailor and I will be in the area so she can throw "a billion baby showers" for Baby Z. Her words, not mine.

With the prospect of many thank you notes in need of being written in the near future, I decided to get a jump on making thank you cards. I promise, I'm not one of those crazy overachievers who creates time-intensive and stunning cards. I make simple cards. I don't know if it even counts as making cards, because really, I just stamp cute stuff on some cards and call it a day.

REGARDLESS. I am very pleased with these ahdorable cards I churned out.

Forever Last in Line: DIY Thank You Cards
I had all the stamps on hand from various impulse buys at Michael's. Their dollar stamps are irresistible!! Dat hedgehog! Come on. Can you blame me?

I also found the blank cards and envelopes at Michael's. They were sold in sets of 8 for $1.50. I bought two packages of cards with lil word bubbles cut out of them. I also bought a blue ink pad (also $1.50).

So my grand total so far for these thank you notes is: $4.50. Breaking the bank here, yo. That's probably cheaper than buying sixteen thank-you notes, and I got the added joy of designing my own.

Forever Last in Line: DIY Thank You Cards
I can't get over that hedgie. Sooo cuuutteee.
I am having a very hard time not knowing what gender Baby Z is. I just want to theme all the things. All the baby colors and things and stuff. It's hard to be neutral. -dramatic sigh- At least hedgehogs are pretty neutral, right? The flowers might be a little girly, but it's close enough, right?

Forever Last in Line: DIY Thank You Cards
Love the cut out! So fun.
 And because doing 16 cards wasn't enough, I had to dazzle up the envelopes too. It's totally legit to have matching cards and envelopes; it makes the card seem even more special!!! I stuck with the same stamps, even though I was tempted to use all the stamps I own on the outside. Gotta practice restraint sometimes.
Forever Last in Line: DIY Thank You Cards
Gotta have matching envelopes!!

Forever Last in Line: DIY Thank You Cards
Return address fancy-ness. I feel so posh.
I was surprised how fast I got done with all the baby thank yous. I had some other kind folks I needed to thank for non-baby related things, so I decided to make some other notes to send out. And since I only have black and blue ink, I went with nautical themed thank-yous. It may or may not also be true that I have a ton of nautical stamps. Maybe. Kinda. I have a theme problem. It's a bit of an obsession.
Forever Last in Line: DIY Thank You Cards
AHOY SHIPMATE!!!
I had to make the cards for these notes, but it was super easy. I snatched some cardstock, measured my envelopes, and went to town. I added graph paper accents because, why not? Plus, the blue lines match my blue ink and matching is best. Always.


Forever Last in Line: DIY Thank You Cards
One of my fave stamps: "Just a Quick Note"
Forever Last in Line: DIY Thank You Cards
Again, matching envelopes. I cannot resist the matchingness.
I just love getting and sending mail. I've already used one of the baby notes and three of the nautical ones. I have a hankering to make even MORE cards and just send them to people. If I have your address, beware. Prepare your mailbox for an overload. Hehe.

Do you make cards?
Linkin' up at these fine sites!